Back on to the trailer, the next task was to make a new bulkhead at the end of the trailer.

For this I used a bit of box section welded on to the tub cappings.

Which were reinforced with some angled sections either end.

Which were welded into place.

And riveted to the door stays.

Next up I set about mounting the lights.

This included extending wires.

I wasn’t able to complete all connectors and light mounts as I brought the wrong type of connectors for the brake lights and also didn’t get plinths for the fog and reverse light.
The sankey trailer also didn’t have a reverse light, but it does have two fogs so I’ll change one to fulfil this function.
But at the end of the day I hooked it up to the Defender and tested it all out.
Starting to look good!


The next day and this is what awaits!

The tasks were to change the plug and lead to 13pin type, add in front indicators and side lights, and change one fog to reverse.


Done!

Attaching the new plug.

Fixing the new lead into place.


I then pulled the permanent live and ignition live up into the trailer.
Then to swap over the Defenders 7 pin to a 13 pin! What a pain. I had to create an ignition live as there wasn’t one at the back.

I’ve also decided to relocate the trailer sockets from the demountable tow bars to the underside of the back, just above the chassis rail.
The original idea of having demountable sockets was good, but with the move to 13pin it would be a bit of a faff.

That was a day and half of work! But the electrics are now done, and also fitted the remaining lights.

Next task - the front end panel. To fit this I would need to remove the flange to the front that the door seals would have attached to.

Done

Then out with the old bulkhead.

I was waiting for metal at this point so moved on to fitting the bumpers are the back.

To install these I would need to overcome the issue noted earlier where I would not have access to two bolts at the back of the cross member due to chassis position.
For this I installed a captive nut welded into some tube.


These holes needed enlarging.


One done next one lined up.

All done.

And ground back to smooth.

Bumpers on.

I then wanted to tidy up where the old bulkhead was removed.


I then moved to the rear door for the last task of the day, as a window will not be needed a metal panel will be welded into place.


Next day I mounted the door to the body. And fitted the lock body.


Then the roof went back on, and the door seal was fitted.

I then moved onto install the front panel to the lower section, a sheet of aluminum was cut to shape.

And it was fixed into place using already available holes. The top where supports for the door reveals, the bottom where where the tub is fixed to the cab of the Defender. These had rivet nut fitted into them.


The cappings were next.

I was then able to fit the last of the lights.

I was then out of parts so returned to the failure of a brake line. At this stage I wasn’t able to identify what thread was required for the brake fitting so I decided to make my own elbow.


This would be made from a section of round bar I had that was just the right size! Bit of luck.

On the lathe I drilled a 3mm hole within, then a bigger hole part way down, which was tapped at 12mm x1, then a chamfer was added to one end, part parted off, and chamfer the other end.


Not a bad match, but mating surfaces were next.


A hole was then drilled and hey presto!

I then had to make up new brake lines, I hate this bit.


But with the new elbow installed the brake lines turned out better than before so all good.
Next task was to cut the side panels to angle.
One down:

Bending the edge, without a press brake.


And the other side.

The end of the panels had a fixing arrangement that had to be modified. Here you can see the sections.


All mounted and in place.

Top panel next.


A lot of measuring took place prior to cutting and it was still oversized, but better than being undersized!


I installed aluminum angle to the edges as a capping, and was in two minds whether or not to weld the lower and upper sections together - though it might be a risk with my bad welding skills, but when they sat next to each other it didn’t look right so I gave it a go. What's the worst that could happen!


That leaves only one side to fix, the top.


Time to replace the rear quarter glass

Some electrics


Time for a few small bits while parts arrive.


Bottle opener

At this point I planned out how to wire the electrics of the trailer.

Door gas strut.

Then the battery arrived so made up a simple battery tray out of some aluminum angle and an old strap. This will be riveted on to the tub. It was also a good chance to practice a bit more TIG.


Another part came in and got fitted, 240v inlet. I made a cardboard template for this.

Then this was used to create the opening in the front.

Fitted - of course it rained just before I finished.

Next day, next task - mud flaps! On a Defender this is an easy task, but this is not a Defender…..

The issue with the sankey trailer chassis is that the ladder beams are much further apart which means the mud flap brackets are too long. The are also too low. So to overcome this a new hangar was required.


I left them long just in case the hanger isn’t strong enough. If they prove to be OK as is, I’ll trim them down. I’d also add that the bottoms of the side panels needed repairing as a lot of the aluminum had pulled or rotted away. So this was done at the same time, and the stiffening bars refitted.
Isolator and battery charger fitted - at this point I’m waiting for some cable and a relay.

Trailer on charge via the hook up.

Side by side. Looking good, but would be better if it was painted.

A few finishing items, fitting a plug holder.
An access door for the electrical items.
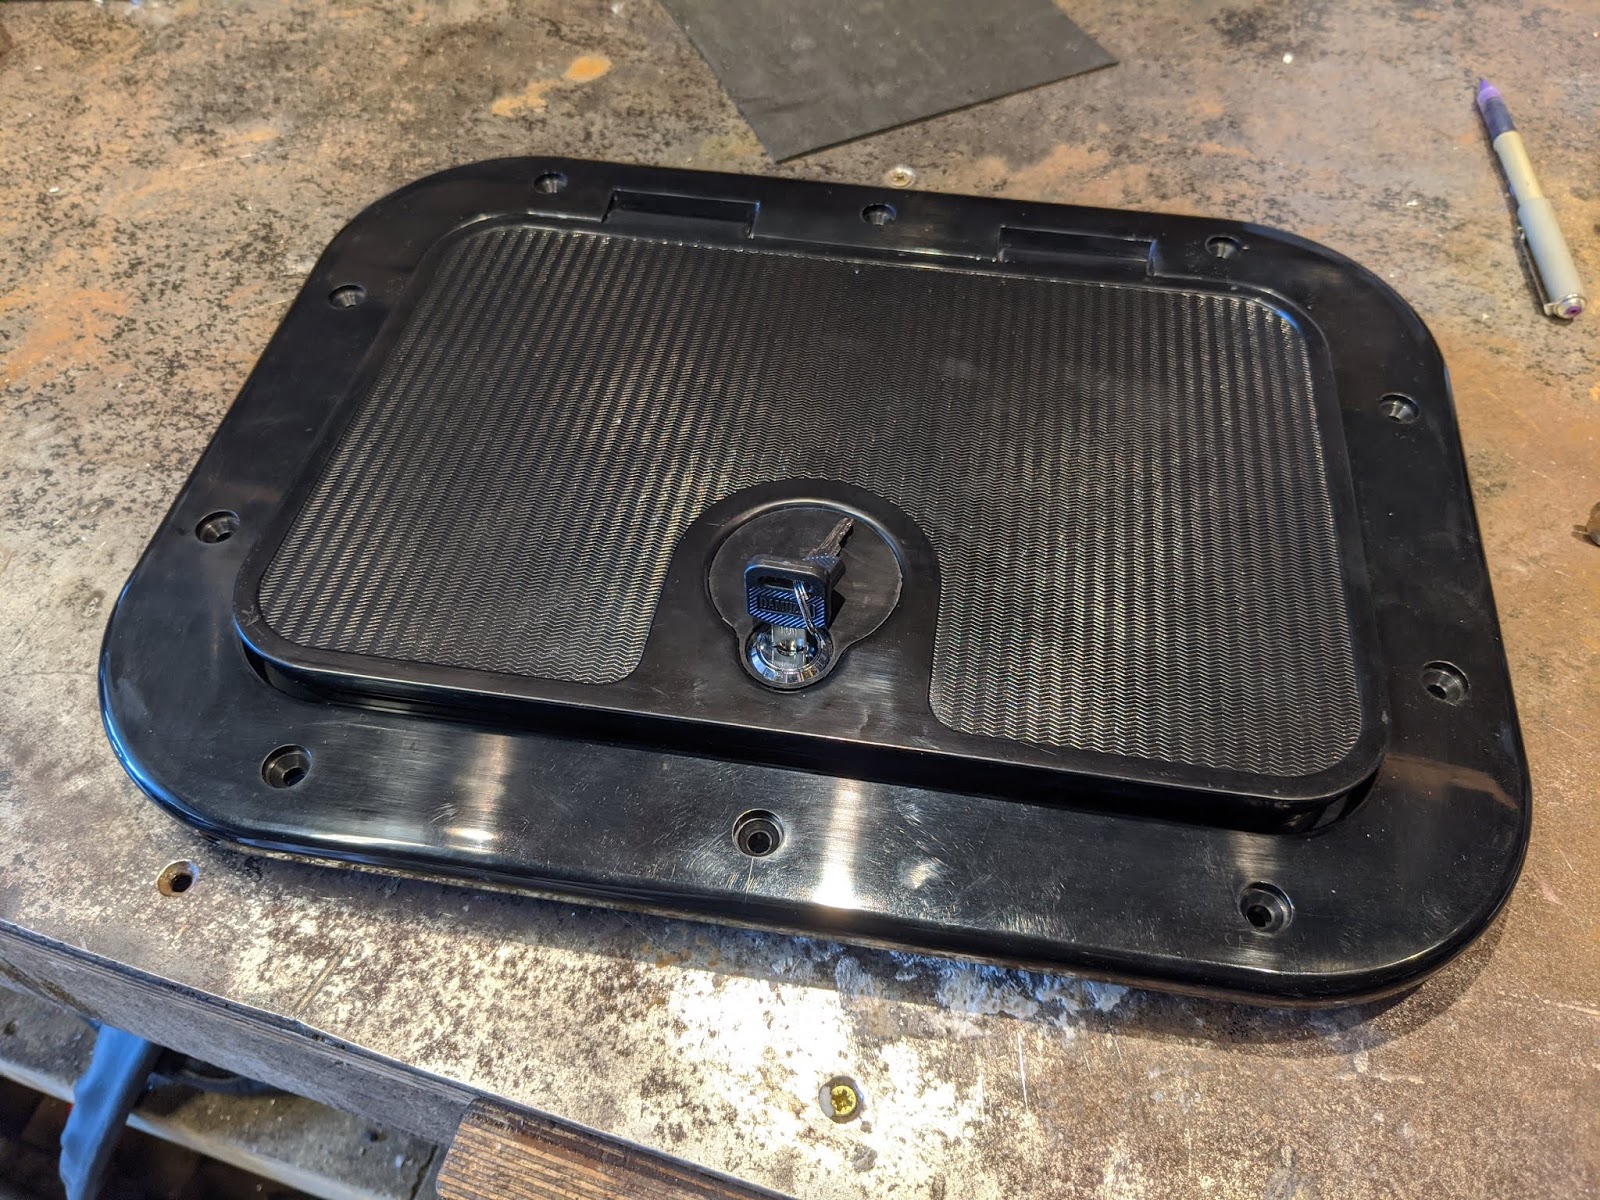
First I made a template

Which was used to mark out the opening.


Then the hole was cut and the door mounted


Only a few jobs left to tackle before the maiden voyage!